Running NetworkMiner in Windows Sandbox
NetworkMiner can be run in a highly efficient Windows Sandbox in order to analyze malicious PCAP files in Windows without accidentally infecting your Windows PC. This blog post shows how to set up a Windows Sandbox that always boots up a fresh install of Windows 10 with the latest version of NetworkMiner installed.
I generally recommend analyzing Windows malware in Linux, or some other non-Windows environment, in order to avoid accidentally infecting yourself (NetworkMiner runs fine in Linux btw). Nevertheless, I still often find myself loading capture files containing malicious network traffic into CapLoader and NetworkMiner under Windows. I have previously demonstrated that this can be a quick and crude way to perform an anti virus scan of files contained in a pcap file.
Windows Sandbox
If you want to analyze malicious traffic in Windows with minimal risk of infecting yourself then you should definitely check out Microsoft’s Windows Sandbox (available in Windows 10 Pro and Enterprise editions). The Windows Sandbox is using Windows containers, so it’s very efficient compared to spinning up a full Windows VM. It also provides features like kernel isolation, so that the sandbox container doesn’t use the same kernel as the host, and ensures that a new Windows environment is created every time the sandbox is run. Windows Sandbox also doesn't run any anti-virus, so it won't interfere with the extraction of malicious contents from within the analyzed capture files.
 Follow these steps to install Windows Sandbox:
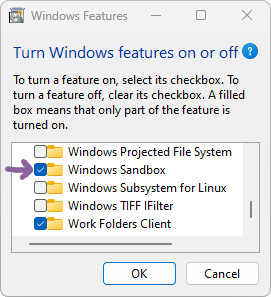
- Run OptionalFeatures.exe, aka “Turn Windows features on or off”
- Enable the “Windows Sandbox” feature (check the box)
- Reboot
Or run this PowerShell command as administrator and then reboot:
Then create a sandbox config, which downloads and installs the latest version of NetworkMiner every time the sandbox is started, by creating a file called “NetworkMinerSandbox.wsb” with the following contents:
<MappedFolders>
<MappedFolder>
<!-- Replace path below with your PCAP dir -->
<HostFolder>C:\Users\Erik\pcap</HostFolder>
<ReadOnly>true</ReadOnly>
</MappedFolder>
</MappedFolders>
<LogonCommand>
<Command>cmd.exe /C "curl -L https://www.netresec.com/?download=NetworkMiner |
</LogonCommand>
</Configuration>
Note: Replace “C:\Users\Erik\pcap” with whatever location your capture files are at
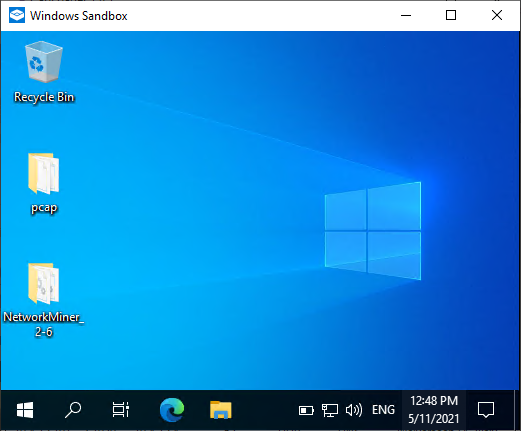
After starting NetworkMinerSandbox.wsb you’ll have a fresh Windows machine up and running within a couple of seconds. The latest version of NetworkMiner and your PCAP dir are both accessible from the sandbox’s desktop.

Image: NetworkMiner 2.6 installed in a clean Windows Sandbox environment
Moving files in or out of the sandbox is just a matter of copy and paste (Ctrl+C / Ctrl+V).
VirtualBox and Windows Sandbox

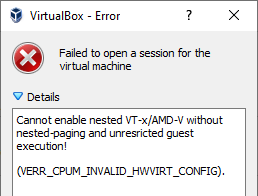
Are you using VirtualBox to run virtual machines on your Windows host and getting an error message saying “Failed to open a session for the virtual machine”, with details such as “Failed to get device handle and/or partition ID” (VERR_NEM_VM_CREATE_FAILED) or “Cannot enable nested VT-x/AMD-V without nested-paging and unrestricted guest execution”, after enabling Windows Sandbox?
Even though Windows Sandbox doesn’t need Hyper-V it still requires a hypervisor, which unfortunately conflicts with VirtualBox. You can disable the hypervisor by running the following command as administrator:
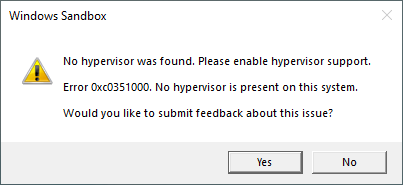
...and then restart the computer. Turning off the hypervisor will unfortunately prevent Windows Sandbox from running, giving an error message saying “No hypervisor was found. Please enable hypervisor support.” (Error 0xc0351000)

To re-enable the hypervisor, in order to run Windows Sandbox again, you’ll need to run
and restart the host.
Update May 26, 2021
We have now uploaded a simple Windows Sandbox config to our website here:
https://www.netresec.com/?download=NetworkMinerSandbox
This script runs on any Windows Pro machine that has the Sandbox feature active.
Posted by Erik Hjelmvik on Tuesday, 11 May 2021 13:39:00 (UTC/GMT)
Tags: #Netresec #NetworkMiner #PCAP #Windows #Sandbox #Windows Sandbox #Malware


